Apache, MySQL and PHP on the Raspberry Pi 3
As mentioned before, I'm setting up a LAMP stack using Cent OS v7 on my Raspberry Pi 3. LAMP stands for Linux, Apache, MySQL and PHP. The A for Apache could also be E for Nginx (pronounced like Engine-Ecks) and the P for PHP could also be P for Perl or Python. This software together forms what's referred to as a "stack", which is simply a common development term for a set of software that works together for a specific application. In this post, I'll be covering the installation and initial configuration of Apache, MySQL and PHP.
We're going to start by installing Apache. It's package name in Yum is httpd. Prior to installing packages, I like to run a quick update just to make sure everything is up to date.
sudo yum update
After that's done, we'll use Yum to install Apache. It'll automatically grab and install any missing dependencies that Apache will need, as shown below. The command to install Apache is
sudo yum install httpd

Once the install has completed successfully, we'll issue two systemctl commands. The first will start the httpd service and the second will set the service to startup at boot.
sudo systemctl start httpd.service
sudo systemctl enable httpd.service
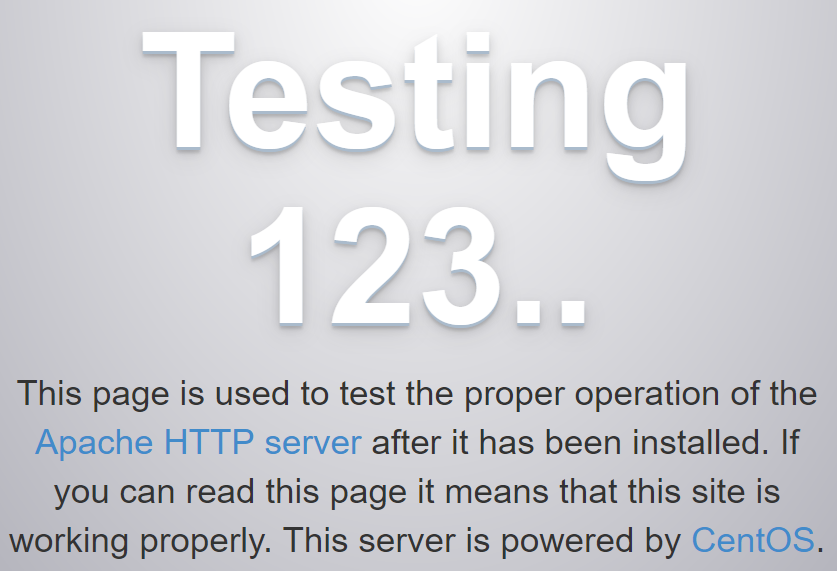
Now, you should be able to open a web browser, point it at the IP of your server and you should see the Apache Test Page, like below.

By default, the directory where you should place your content is /var/www/html. This is known as the DocumentRoot path for Apache. Later on in the tutorial, we're going to creating a file in this DocumentRoot path so we'll need to make a permissions modification in order to make that happen. Out of the box, the /var/www/html directory only allows read, write, and execute permissions to the root account. Every other user within the system, even those with sudo access may only read or execute. Without getting into too deep of an explanation of how file and directory permissions work in Linux, we're going to switch over to our root account and use the chmod command to modify permissions of the /var/www/html directory so that anybody in the sudoer's group can have full access.
su root
chmod 775 /var/www/html
Before we move on, we're going to add the index to our Apache installation. It comes disabled by default. To enable the index, open the /etc/httpd/conf.d/welcome.conf file and as shown below, change the "-" next to Indexes to a "+"

We're going to be installing MariaDB, which is a fork of MySQL found in RHEL and RHEL-based distributions. Just as with other yum installations, the command to install MariaDB is
sudo yum install mariadb-server
Once installed, we'll want to start the database services along with enabling them to start upon boot.
sudo systemctl start mariadb
sudo systemctl enable mariadb.service
Next, we'll want to perform the initial configuration of the database (DB) service. This will walk you through setting the root password for the database server itself, along with setting some basic security parameters. This initial configuration is done with a pre-made script. To run the script, type
sudo mysql_secure_installation
By default, the root account for the DB service is empty, so you can just press Enter when prompted for it. Then, you can choose to change the root password. Do this. You'll also be asked if you'd like to remove anonymous users, the root abilities to remotely connect to the DBs, and the default Test DB (which is open to everybody). Click Y for all of these options if you're not sure. If your specific situation calls for it, then leave them.

This will feel a bit "deja-vu" but the command to install PHP is
sudo yum install php php-mysql
I'm adding the php-mysql module because I know that I'm going to be using it for my purposes. For a list of other PHP modules, you can use the command
yum search php-
The output should look similar to the image below

If you know your application is going to need specific modules, then you can simply include them after "php" in the Yum installation command above.
Once PHP and any additional modules you may need are installed, we're going to create our first php document and place it in Apache's DocumentRoot path. The command below will take the echo'd text and place it into a file called info.php in our DocumentRoot path.
sudo echo "<?php phpinfo(); ?>" > /var/www.html/info.php
Now, go back to your browser and refresh the page pointing to your server. You should now see something like the following.

At this point, we're done. You've now got a web server with MySQL and PHP installed. We're not using any SQL databases but it's ready to rock and roll.
Apache
We're going to start by installing Apache. It's package name in Yum is httpd. Prior to installing packages, I like to run a quick update just to make sure everything is up to date.
sudo yum update
After that's done, we'll use Yum to install Apache. It'll automatically grab and install any missing dependencies that Apache will need, as shown below. The command to install Apache is
sudo yum install httpd

Once the install has completed successfully, we'll issue two systemctl commands. The first will start the httpd service and the second will set the service to startup at boot.
sudo systemctl start httpd.service
sudo systemctl enable httpd.service
Now, you should be able to open a web browser, point it at the IP of your server and you should see the Apache Test Page, like below.
By default, the directory where you should place your content is /var/www/html. This is known as the DocumentRoot path for Apache. Later on in the tutorial, we're going to creating a file in this DocumentRoot path so we'll need to make a permissions modification in order to make that happen. Out of the box, the /var/www/html directory only allows read, write, and execute permissions to the root account. Every other user within the system, even those with sudo access may only read or execute. Without getting into too deep of an explanation of how file and directory permissions work in Linux, we're going to switch over to our root account and use the chmod command to modify permissions of the /var/www/html directory so that anybody in the sudoer's group can have full access.
su root
chmod 775 /var/www/html
Before we move on, we're going to add the index to our Apache installation. It comes disabled by default. To enable the index, open the /etc/httpd/conf.d/welcome.conf file and as shown below, change the "-" next to Indexes to a "+"

MySQL
We're going to be installing MariaDB, which is a fork of MySQL found in RHEL and RHEL-based distributions. Just as with other yum installations, the command to install MariaDB is
sudo yum install mariadb-server
Once installed, we'll want to start the database services along with enabling them to start upon boot.
sudo systemctl start mariadb
sudo systemctl enable mariadb.service
Next, we'll want to perform the initial configuration of the database (DB) service. This will walk you through setting the root password for the database server itself, along with setting some basic security parameters. This initial configuration is done with a pre-made script. To run the script, type
sudo mysql_secure_installation
By default, the root account for the DB service is empty, so you can just press Enter when prompted for it. Then, you can choose to change the root password. Do this. You'll also be asked if you'd like to remove anonymous users, the root abilities to remotely connect to the DBs, and the default Test DB (which is open to everybody). Click Y for all of these options if you're not sure. If your specific situation calls for it, then leave them.

PHP
This will feel a bit "deja-vu" but the command to install PHP is
sudo yum install php php-mysql
I'm adding the php-mysql module because I know that I'm going to be using it for my purposes. For a list of other PHP modules, you can use the command
yum search php-
The output should look similar to the image below

If you know your application is going to need specific modules, then you can simply include them after "php" in the Yum installation command above.
Once PHP and any additional modules you may need are installed, we're going to create our first php document and place it in Apache's DocumentRoot path. The command below will take the echo'd text and place it into a file called info.php in our DocumentRoot path.
sudo echo "<?php phpinfo(); ?>" > /var/www.html/info.php
Now, go back to your browser and refresh the page pointing to your server. You should now see something like the following.

At this point, we're done. You've now got a web server with MySQL and PHP installed. We're not using any SQL databases but it's ready to rock and roll.

Comments
Post a Comment