File Server Migration to Server 2012 (Part 1)
File Service is possibly the most basic and important service provided on a network. I say it's the most important because next to email, a business can't run if it's workers can't access their files. I also say it's one of the most basic because there's no special program that has to be running on the server like Exchange or something. There's no crazy settings to muck around with either (that is, unless you count managing NTFS permissions as "mucking"). It's a big box where people store their files on the network. In fact, it's so simple it's almost beautiful. Almost.
Below, I talk about how to migrate your data between file servers, namely from Server 2008/2008r2 to Server 2012.
Below, I talk about how to migrate your data between file servers, namely from Server 2008/2008r2 to Server 2012.
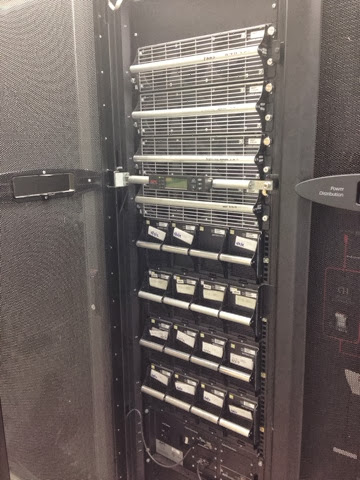
Our current main file server has iSCSI targets on our SAN mapped to drive letters. Each drive letter is shared and usually corresponds with a specific department (since we do nearly all of the hosting for several Student Affairs departments). We have other file servers as well (one for IT, one for marketing to put their videos and such on, etc). These servers are all running Server 2008r2 and store the files on local storage. Our goal is to migrate them to Server 2012 Core. We like Server 2012 Core because of:
- Deduplication - Ever have your users make several different versions of the same humongous files? Us too. Deduplication will keep 1 copy of the same file even when the users try to save a hundred different versions of it. Actually, it uses some fancy means of examining the file, "chunking"the files, keeping only one copy of the common chunks, thus saving space. This is a new feature for Server 2012 and it's kind of a big deal.
- No GUI - This means no programs that come with the full GUI and desktop-experience feature which means fewer updates and fewer reboots after said updates (I'm looking at you, IE and Silverlight.) Plus, we should all be learning Powershell anyway.
- Fewer Resources - Since Server 2012 Core has fewer programs, it doesn't have nearly as many processes to run. This makes for a smaller overall footprint within our virtual infrastructure. This makes our VMware Admin happy.
THE PROCESS(es)
Much like anything else, there's multiple ways to skin a cat. Based on my research, there's 3 ways to move your data from one file server to another.
- iSCSI Target Swap
When I first started testing moving over the file server, I didn't have any files to test with so I made some. I made a folder called "Files", shared it, made sub folders for various departments (Accounting, Management, Maintenance, IT, etc.), put some text files in each folder, and gave a few folders and files different permissions. While this would be suitable for testing moving things via Robocopy or Server Migration Toolkit, our file servers actually keep their data on iSCSI targets, not local disks. If I'm not testing with a small LUN then I'm not testing right.
My idea was to setup a LUN, setup the iSCSI connection, connect my a test server, make some files and folders on the LUN, disconnect the test server, connect the new test server and see if all of my data was still there. On one hand, it sounded so simple. On the other hand, computers are rarely that simple and it has to be more complicated than that.
As it turns out, it worked. I disconnected the first server, connected the new server, brought the drive online, opened up explorer and all of my files were still there, permissions and all. However, the shares don't migrate with it. All of your directory will be there but share and share permissions don't migrate with the files and folders.
- The Robocopy Way
Robocopy is a command-line tool for directory and/or file replication. It's been around since the NT/Win2k days and is a very powerful tool. There are tons of options and flags. It took me a few tries to get the command down right. The command that's been working for me in testing has been
robocopy \\oldtestfileserver\testfileshare$ \\newtestfileserver\testfileshare$ *.* /E /COPYALL /ZB /R:1 /W:5
robocopy \\source-server \\target-server
- *.* to indicate that I want to move any file with any extension.
/Eto include any subfolders including empty subfolders./COPYALLto copy Data, Attributes, Timestamps, NTFS ACLs, Owner information, and Auditing information./ZBis a 2-part option. The /Z option will copy files in restartable mode. This means that if there was a network interruption during the robocopy command, the job would continue once the network connection was re-established. The /B option is to copy files in backup mode which overrides file and folder permissions. With the /ZB command, it will copy in restartable mode unless the file is blocked, in which case the file will be copied in backup mode./R:nis for setting the number of retry attempts if copying a file fails. The default is 1000000. I set mine to 1 retry for testing simply for the sake of speed./W:nis for setting the wait time in seconds before reattempting to copy a failed file. The default is 30 seconds but since I was testing, I set mine to five for the sake of speed.
(Typically, the
/COPY option has it's own set of sub-options. The sub-options are D for Data, A for Attributes, T for Timestamps, S for Security (which means NTFS ACLs), O for Owner info, and U for aUditing info. You can string these together to use the /COPY Command. For example, to just move Data, Attributes and Timestamps, your /COPY option would look something like /COPY:DAT
The
Robocopy still doesn't solve the migration of bringing share and share permissions as well so there's that to consider.
For more information on Robocopy options and flags, here's the link I got the most out of.
/COPYALL option is the same as /COPY:DATSOU, which is everything.)Robocopy still doesn't solve the migration of bringing share and share permissions as well so there's that to consider.
For more information on Robocopy options and flags, here's the link I got the most out of.
- The TechNet Way
The TechNet Way of moving a file server is by way of Windows Sever Migration Toolkit (which can migrate other services to another server as well). The gist of it is that you install the Server Migration Toolkit on both the old server and the new server, open TCP and UDP ports 7000, use an export-smigserversetting-something command to export server settings data, run a send-smigserversetting-something command on the old server, run a receive-smigserversetting-something command on the new server and some kind of black magic happens.
Once again, the TechNet instructions left me with more questions than answers and made me feel as though I have no idea what I'm doing with a computer. You can view the instructions here for your convenience.
Once again, the TechNet instructions left me with more questions than answers and made me feel as though I have no idea what I'm doing with a computer. You can view the instructions here for your convenience.
Migrating the Shares and Share Permissions
Shares and Share Permissions are actually part of the OS itself. That's why shares haven't been migrating over. My boss emailed me a link to a TechNet article on Saving and Restoring Windows Shares and asked me to check it out and see if it would work. The article says it's only compatible with Server 2k8r2 and older but the same idea applies if you're saving shares from one computer and restoring to another.
By opening regedt32.exe, and exporting the keys for
This has been one of a few larger projects I have going on so please stay tuned as I discuss the actual migration plan, training for other staff members (because everyone uses the file server) and information about the the storage features we're trying to leverage.
Shares and Share Permissions are actually part of the OS itself. That's why shares haven't been migrating over. My boss emailed me a link to a TechNet article on Saving and Restoring Windows Shares and asked me to check it out and see if it would work. The article says it's only compatible with Server 2k8r2 and older but the same idea applies if you're saving shares from one computer and restoring to another.
By opening regedt32.exe, and exporting the keys for
HKLM\SYSTEM\CurrentControlSet\Services\LanmanServer\Shares from your source file server, you can import them back to the same location on the target file server after either a Robocopy transfer or an iSCSI connection swap. A restart is needed on the target file server after the registry keys are imported to the same location but once that's complete, you now have all of your files, shares, and permissions intact.This has been one of a few larger projects I have going on so please stay tuned as I discuss the actual migration plan, training for other staff members (because everyone uses the file server) and information about the the storage features we're trying to leverage.

very nice.............
ReplyDelete