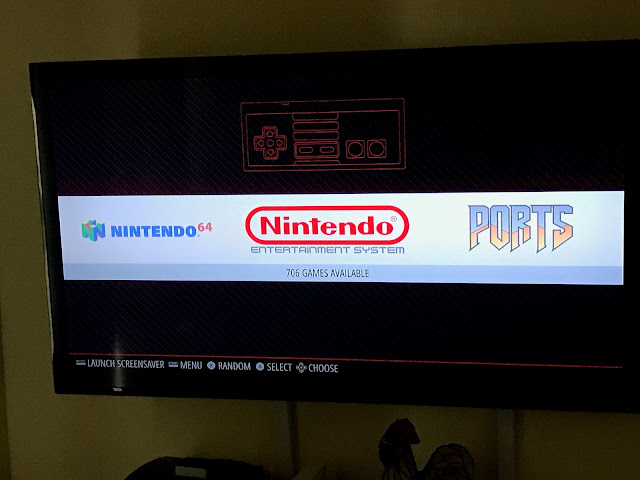
Configuring RetroPie on the Raspberry Pi 3
Ever since Nintendo announced that they were stopping production of the NES Classic (after what felt like months of purposely under-producing to drive up the demand/price), I've been wanting to get another Raspberry Pi and setup RetroPie on it to play the games of my childhood. Well, I recently celebrated a birthday and got a few Amazon gift cards (which I enjoy very much), so I pulled the trigger on a second RPi, which I'm dedicating specifically to RetroPie and duties. In this article, I'd like to go over configuring the RetroPie. I'm going to assume that you've already got your ROMs and I will not be covering the installation of RetroPie in this post. If you've ever setup an RPi, it's the same process. If you have not and this is your first time, then check out my recent post about the process (It's titled for installing CentOS v7, but the process is the same for installing just about any OS to the Raspberry Pi).
Upon first boot, you'll be asked to map your controller. It's a pretty simple process where you press the button you want to be the "A" button, which one you want to be the left trigger, etc. If your goal is to configure a wireless controller via Bluetooth, I suggest starting with a keyboard just for the initial configuration.
If you're using an Ethernet connection, then you really don't have any initial configuration to do. Both wired and wireless NICs are configured for DHCP by default. If you're going wireless like I am, then you'll have to go into the RetroPie menu, Select WiFi at the bottom. You'll be taken to an NCURSES menu to connect to your wireless SSID.
For the emulators of older consoles, all you need to do is open up an explorer window on a computer that's on the same network as your Pi, and type \\retropie. You'll see that there's a ROMs folder. From there, just drag n' drop your ROMs into the folders respective to their systems.
The only system that I've had trouble doing that with has been N64. I'm working on a separate post about getting my N64 setup squared away. Atari 2600, 7800, NES, SNES, Sega Genesis, and GBA ROMs worked fine without any tweaking.
At this point, you're ready to rock n' roll and start firing up some games. Have fun!
Map your Controller
Upon first boot, you'll be asked to map your controller. It's a pretty simple process where you press the button you want to be the "A" button, which one you want to be the left trigger, etc. If your goal is to configure a wireless controller via Bluetooth, I suggest starting with a keyboard just for the initial configuration.
Configure The Network
If you're using an Ethernet connection, then you really don't have any initial configuration to do. Both wired and wireless NICs are configured for DHCP by default. If you're going wireless like I am, then you'll have to go into the RetroPie menu, Select WiFi at the bottom. You'll be taken to an NCURSES menu to connect to your wireless SSID.
Add your ROMs
For the emulators of older consoles, all you need to do is open up an explorer window on a computer that's on the same network as your Pi, and type \\retropie. You'll see that there's a ROMs folder. From there, just drag n' drop your ROMs into the folders respective to their systems.
The only system that I've had trouble doing that with has been N64. I'm working on a separate post about getting my N64 setup squared away. Atari 2600, 7800, NES, SNES, Sega Genesis, and GBA ROMs worked fine without any tweaking.
At this point, you're ready to rock n' roll and start firing up some games. Have fun!


Comments
Post a Comment